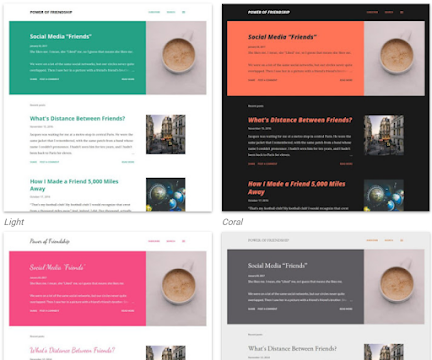
這是一篇、一步一腳印,細說整個修改 Notable 佈景主題 的過程筆記,倘若、您有興趣可以進來看看唷!
希望、您也能提供一些意見哦。
首先、在版面配置的最下面新增一個欄位,自訂 CSS 樣式區 文字小工具,用來撰寫要修改的 CSS 樣式碼。
點按下面的 Code 複製 HTML碼: 安裝自訂 CSS 樣式區 小工具
<b:widget id='Text17' locked='false' title='自訂 CSS 樣式區' type='Text'
version='2' visible='true'>
<b:includable id='main'>
<div class='widget-content'>
<style type='text/css'>
<data:content/>
</style>
</div>
</b:includable>
</b:widget>
接下來 ~ 刪除文章摘要的兩邊空隙
進入 ~ XML 範本 找到如下樣式碼
.Blog{
padding:0;
padding-$startSide:136px
}
//--- 刪掉這一行、左邊內距 ~> padding-$startSide:136px
.Blog { padding: 0; }
放大摘要縮略圖~>.post-outer .snippet-thumbnail
.post-outer .snippet-thumbnail{
-webkit-box-align:center;
-webkit-align-items:center;
-ms-flex-align:center;
align-items:center;
background:#000; <~ 刪除
display:-webkit-box;
display:-webkit-flex;
display:-ms-flexbox;
display:flex;
-webkit-box-flex:0;
-webkit-flex:0 0 auto;
-ms-flex:0 0 auto;
flex:0 0 auto;
height:256px; 高度 改成 ~> 25vw
-webkit-box-pack:center;
-webkit-justify-content:center;
-ms-flex-pack:center;
justify-content:center;
margin-$endSide:136px; 右邊外距 改成 ~> margin: 0
overflow:hidden;
-webkit-box-ordinal-group:3;
-webkit-order:2;
-ms-flex-order:2;
order:2;
position:relative;
width:256px 改成 ~> 40%
}
.post-outer .snippet-thumbnail{
-webkit-box-align:center;
-webkit-align-items:center;
-ms-flex-align:center;
align-items:center;
display:-webkit-box;
display:-webkit-flex;
display:-ms-flexbox;
display:flex;
-webkit-box-flex:0;
-webkit-flex:0 0 auto;
-ms-flex:0 0 auto;
flex:0 0 auto;
height: 25vw;
-webkit-box-pack:center;
-webkit-justify-content:center;
-ms-flex-pack:center;
justify-content:center;
margin: 0;
overflow:hidden;
-webkit-box-ordinal-group:3;
-webkit-order:2;
-ms-flex-order:2;
order:2;
position:relative;
width:40%
}
進入 ~ XML 範本 找到 ~ snippet-thumbnail-img
修改摘要短文的邊距 ~> .post-content
.post-content{
margin-$endSide:76px; 改成 ~> margin:0 30px;
max-width:$(feed.width - 604px); 刪除這一行
}
margin-$endSide:76px; 改成 ~> margin:0 30px;
max-width:$(feed.width - 604px); 刪除這一行
}
.post-content{ margin:0 30px;}
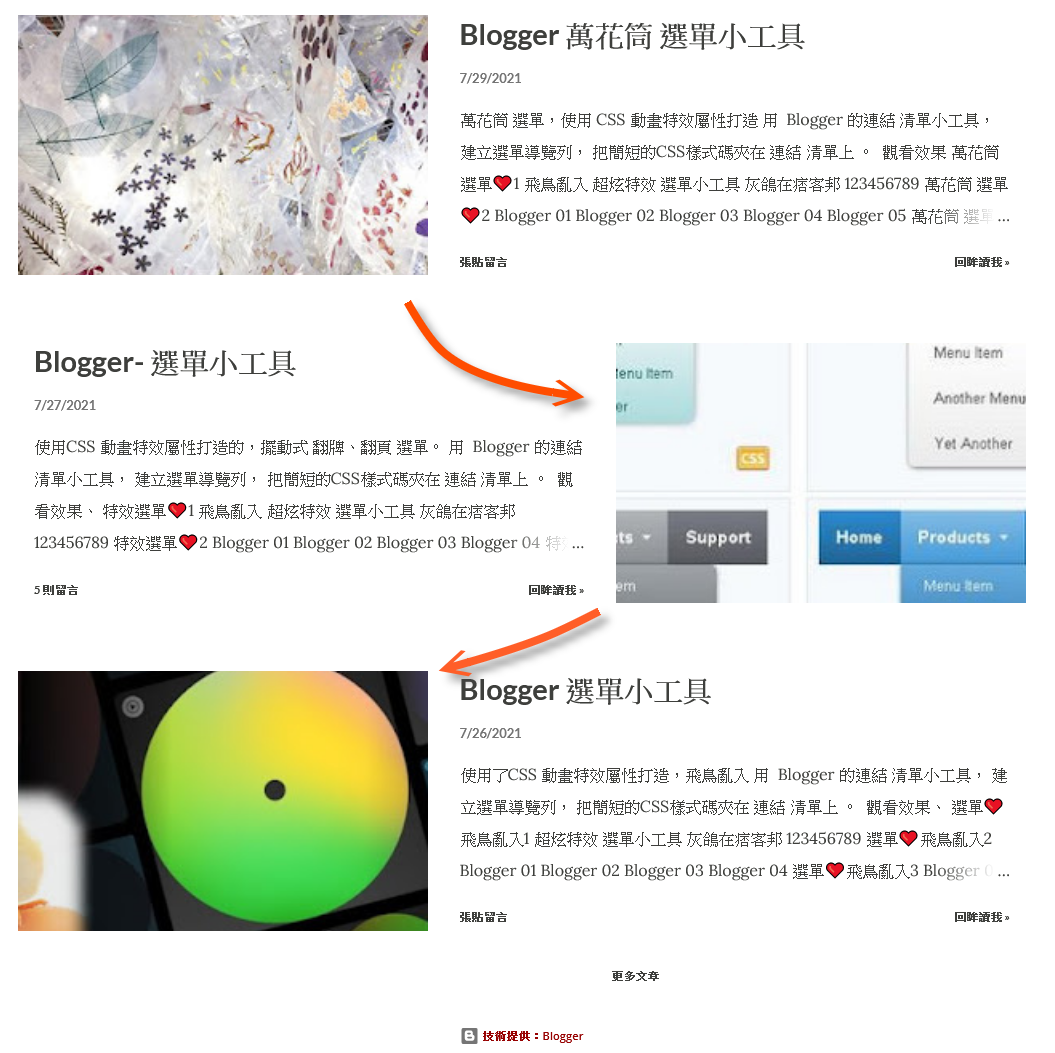
將 縮略圖和短文,改成左右交叉顯示,把下面這2行寫到 ~ 自訂 CSS 樣式區
.post-outer-container .post-content{ align-self: center}
.post-outer-container:nth-child(odd) .post-content{order:3; align-self: end}
給 縮略圖加個料,讓滑鼠經過時會動一下
.snippet-thumbnail-img{transform: scale(1.05);
transition: transform 0.7s cubic-bezier(0.68, -0.7, 0.32, 1.6);
}
.post-outer .snippet-thumbnail-img:hover{transform: scale(1.1);}
再把上面的 CSS 寫到 ~ 自訂 CSS 樣式區
接下來,摘要的標題字,想調小一點,咦 ? 在「主題設計工具」裡怎麼找不到 ??
原來是放在 [資訊提供] 項目裡,這看起來怪怪的, 給它換個名稱吧 [發表文章]
外貌已差不多了,換到內頁,單篇文章閱讀模式
哇~ 標題這麼大,喬一下
寫到 ~ 自訂 CSS 樣式區
body.item-view .Blog .post-title-container{padding:1.5em 3em}
這個範本、文章開頭的第一個字很肥

假如、你想閃開,在第一行的開頭插入,<br> 或 <p class='hidden'/>
調整一下、兩旁的空隙
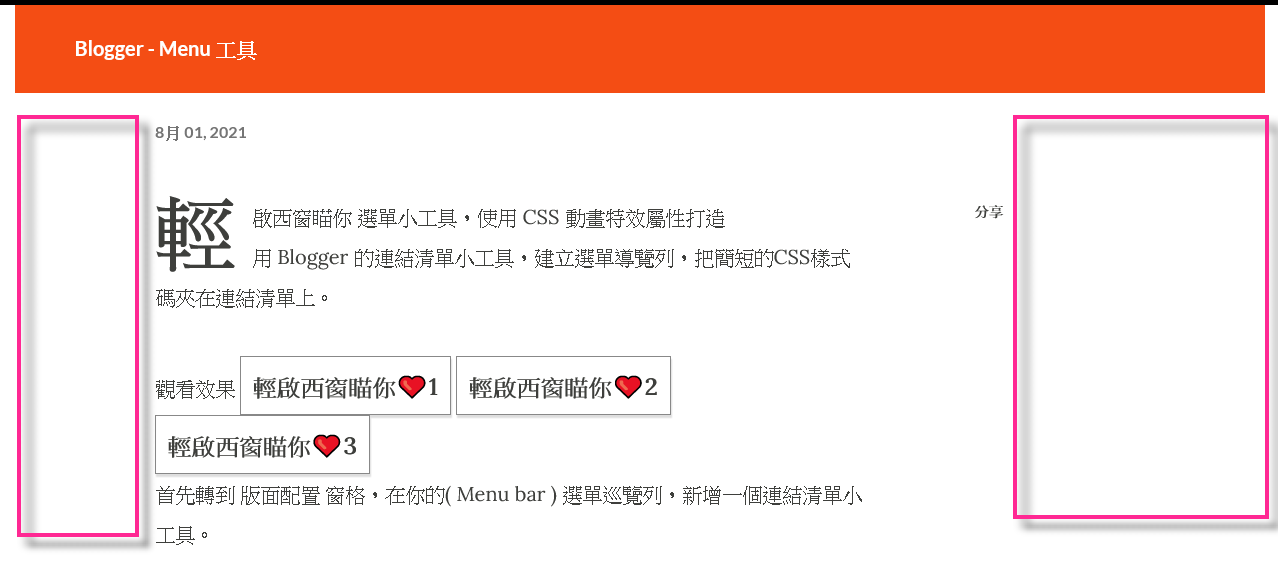
body.item-view .Blog .post-body-container {
padding-right: 290px;
position: relative;
margin-left: 140px;
margin-top: 20px;
margin-bottom: 32px;
}
body.item-view .Blog .post-body {
margin-bottom: 0;
margin-right: 110px;
}
body.item-view .comments, body.item-view .shown-ad, body.item-view .widget.Blog .post-bottom{
margin-bottom:0;
margin-$endSide:400px;
margin-$startSide:140px;
margin-top:0
}
將上面的3組屬性數據,改成如下
body.item-view .Blog .post-body-container {
position: relative;
margin-top: 20px;
margin-bottom: 32px;
}
body.item-view .Blog .post-body {
margin: 0;
}
body.item-view .comments,body.item-view .shown-ad,body.item-view .widget.Blog .post-bottom{
margin:0 40px;
}
position: relative;
margin-top: 20px;
margin-bottom: 32px;
}
body.item-view .Blog .post-body {
margin: 0;
}
body.item-view .comments,body.item-view .shown-ad,body.item-view .widget.Blog .post-bottom{
margin:0 40px;
}
接下來給留言區塊粉飾一下, 寫到 ~ 自訂 CSS 樣式區
/*-- 留言回應 --*/
#comment-editor{
border: 10px solid #f0f0f0;
border-radius: 10px;
padding: 8px;
margin: 20px;
box-shadow: 2px 2px 3px #aaa, -1px -1px 10px #999;
width: 92%;
height:290px;
outline: 2px solid #e0e0e0;
outline-offset: -13px;
background-color: #fff;
}
#comments .comment {
border: 1px solid #aaa;
padding: 10px 10px 30px;
margin-bottom: 20px;
}
#comments .comment .comment {
margin-top: 10px;
margin-left: 20px;
padding: 6px;
border-radius: 0 10px 10px 0;
box-shadow: 1px 1px 3px -1px rgb(51 51 102 / 70%), 0px 3px 8px 2px rgb(50 50 60 / 40%);
border-left: 8px solid #8affe8;
}
#comment-holder ol .continue{display:none}
#comment-holder .continue { display:block}
#top-continue a:before {content:'取消回覆💛 '}
/*----*/

找回 ~ 顯示 上下篇文章的翻頁導覽列
步驟 1 : 編輯HTML >> 進入編輯範本模式 ,同時按下 Ctrl + F , 輸入 blog1 ,按下 Enter 鍵,搜尋到這行標籤
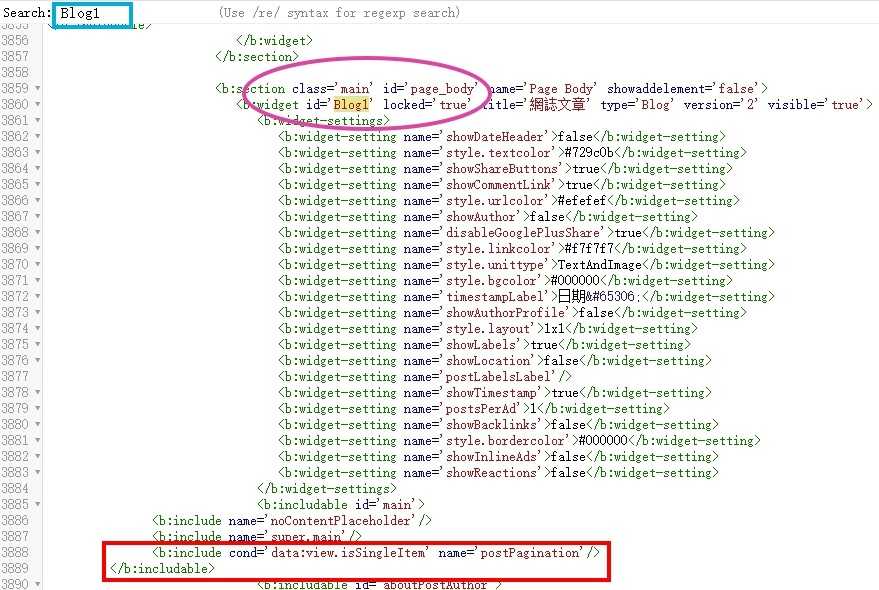
在</b:includable> 之前添加這行代碼 <b:include cond='data:view.isSingleItem'
name='postPagination'/>
步驟 2 : 同時按下 Ctrl + F , 輸入 postPagination ,按下 Enter
鍵,搜尋到這行標籤
 在名稱之前加個 SUPER ,修改後如下
<b:includable id='postPagination'>
<div class='blog-pager container' id='blog-pager'>
<b:include cond='data:newerPageUrl' name='super.previousPageLink'/>
<b:include cond='data:olderPageUrl' name='super.nextPageLink'/>
<b:include cond='data:view.url != data:blog.homepageUrl' name='super.homePageLink'/>
</div>
</b:includable>
<div class='blog-pager container' id='blog-pager'>
<b:include cond='data:newerPageUrl' name='super.previousPageLink'/>
<b:include cond='data:olderPageUrl' name='super.nextPageLink'/>
<b:include cond='data:view.url != data:blog.homepageUrl' name='super.homePageLink'/>
</div>
</b:includable>
步驟 3 : 同時按 Ctrl + F ,輸入 #blog-pager a,按下 Enter 鍵,找到之後
幫連結加上前後空間 ~ margin:0 30px;
#blog-pager a{cursor:pointer;
margin:0 30px;
}
儲存後 ~ 完工
其他、再加上去的小工具,不包含在這 XML 範本裡面,要什麼工具自己加,不強迫推銷。




這版本的表頭我喜歡耶~用哪一個來改好🥰
回覆刪除窩多不用愁 !!
刪除讚讚~ 期待完成的文章!
回覆刪除慢工出細活 ~
刪除感謝灰鴿大方分享!照著您的教學一步一步更換了樣式,真的大大幫助我這個CSS苦手QQ
回覆刪除很喜歡把縮略圖換成左右交叉顯示!
歡迎來訪~
刪除非常高興你用得到,能自行修改樣式,表示你對語法有一定程度的熟悉!!